
How To Prevent From Baby Bottle Tooth Decay Cavities
Preventing Baby Bottle Tooth Decay: A Comprehensive Guide to Protecting Your Child’s Smile
Baby bottle tooth decay, also known as early childhood caries, is a serious dental condition that can significantly impact a child’s oral health. It’s characterized by the rapid destruction of tooth enamel, particularly affecting the front teeth, and is primarily caused by prolonged exposure of a child’s teeth to sugary liquids. Understanding the causes, risks, and effective prevention strategies is paramount for parents and caregivers. This article provides an in-depth, SEO-friendly guide to combatting baby bottle tooth decay, empowering you with the knowledge to safeguard your child’s developing smile.
The primary culprit behind baby bottle tooth decay is the frequent and prolonged contact of a child’s teeth with fermentable carbohydrates, most commonly found in milk, formula, juice, and sweetened liquids. When these sugars remain on the teeth, bacteria present in the mouth metabolize them, producing acids. These acids then demineralize the tooth enamel, initiating the decay process. The typical pattern of baby bottle tooth decay involves the upper front teeth, as they are most consistently bathed in the liquid from a bottle or sippy cup during feeding. However, lower teeth can also be affected, especially if the child also nurses or sleeps with a bottle. Crucially, the damage is not solely due to the sugar content but also the duration of exposure. Allowing a child to fall asleep with a bottle of anything other than plain water, or to sip on sugary drinks throughout the day, creates an environment conducive to acid production and enamel erosion.
Several factors increase a child’s risk of developing baby bottle tooth decay. Genetics can play a role, as some individuals may have enamel that is naturally more susceptible to decay. However, environmental factors are overwhelmingly the most significant contributors. Poor oral hygiene habits, such as infrequent or ineffective brushing, allow plaque – a sticky film of bacteria – to accumulate on the teeth, accelerating the decay process. If the mother or primary caregiver has a high level of decay-causing bacteria in their mouth, this can be transmitted to the child through saliva, for example, by sharing utensils or cleaning a pacifier in the mouth. Dietary habits are another critical risk factor. Frequent snacking on sugary foods and drinks, particularly between meals, exposes teeth to repeated acid attacks. Lack of fluoride exposure is also a concern. Fluoride strengthens tooth enamel, making it more resistant to acid demineralization. If a child doesn’t receive adequate fluoride through fluoridated water, toothpaste, or professional applications, their teeth are more vulnerable. Furthermore, premature birth or low birth weight can sometimes be associated with underdeveloped enamel, making these children more prone to decay.
Preventing baby bottle tooth decay begins long before the first tooth erupts. The journey starts with understanding the importance of oral hygiene from infancy. Even before teeth emerge, it’s beneficial to gently wipe a baby’s gums with a clean, damp cloth after feedings to remove milk residue. This habit establishes a routine for oral care. Once the first tooth appears, typically around six months of age, the real work of brushing begins. Use a soft-bristled infant toothbrush with a tiny smear of fluoride toothpaste, about the size of a grain of rice. The amount of toothpaste is crucial; too much can lead to fluorosis, while too little may not provide sufficient protection. Brush gently twice a day, once in the morning and once before bedtime, ensuring all surfaces of the teeth are cleaned. As more teeth erupt, transition to a pea-sized amount of fluoride toothpaste when the child is around three years old, and supervise brushing diligently to ensure thoroughness.
Dietary modifications are fundamental to preventing baby bottle tooth decay. The most critical step is to avoid putting a baby to bed with a bottle containing anything other than plain water. This includes milk, formula, juice, and any sweetened beverages. When a baby falls asleep with these liquids in their mouth, their teeth are constantly exposed to sugars, and saliva flow, which naturally cleanses the mouth, is significantly reduced during sleep. This prolonged contact creates an ideal environment for bacterial acid production. Furthermore, limit the frequency of sugary drinks and snacks throughout the day. If offering juice, ensure it’s 100% fruit juice and dilute it with water. Serve juice only at mealtimes, preferably with a meal, to minimize its contact with teeth. Avoid using a sippy cup as a constant “sipper” throughout the day; it should be treated as a transitional tool, not a perpetual milk dispenser. Encourage the use of a regular cup as soon as the child develops the motor skills, typically around 12 months of age. Water should be the primary beverage of choice between meals.
Fluoride plays a vital role in strengthening tooth enamel and making it more resistant to acid attacks. If your local tap water is fluoridated, this is a primary source of fluoride for your child. You can check with your local water authority to confirm fluoride levels. If your water is not fluoridated, or if your child primarily drinks bottled water, discuss fluoride supplements with your pediatrician or dentist. Additionally, using fluoride toothpaste is essential. Ensure you are using a toothpaste with an appropriate fluoride concentration for infants and young children, as recommended by dental professionals. Professional fluoride treatments applied by a dentist can also provide an extra layer of protection, especially for children at higher risk.
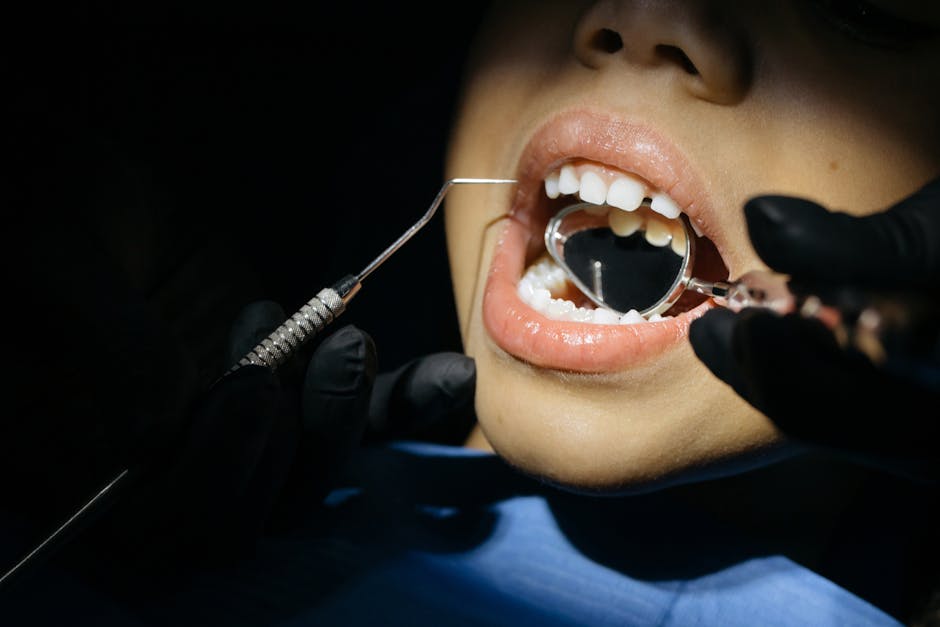
The establishment of regular dental visits is a cornerstone of preventing baby bottle tooth decay and ensuring overall oral health. The American Academy of Pediatric Dentistry recommends the first dental visit by the child’s first birthday, or within six months of the eruption of the first tooth. These early visits serve multiple purposes. They allow the dentist to assess your child’s oral development, identify any early signs of decay, and provide personalized advice on oral hygiene and diet. Dentists can also offer anticipatory guidance, educating parents on potential risks and preventive measures specific to their child’s age and needs. Early detection of problems is crucial, as intervention at the earliest stages of decay is far more effective and less invasive. Subsequent dental visits should be scheduled at intervals recommended by your dentist, typically every six months for routine check-ups and cleanings.
Understanding and managing the transmission of cavity-causing bacteria is an often-overlooked aspect of prevention. Bacteria responsible for tooth decay can be transmitted from caregiver to child. Practices like sharing utensils, cleaning a pacifier with your mouth, or pre-masticating food can introduce these bacteria into a baby’s developing oral microbiome. It’s crucial for caregivers to maintain their own excellent oral hygiene to minimize the bacterial load they might pass on. Regular dental check-ups for caregivers are just as important as for the child.
Breastfeeding offers numerous health benefits, and while it can be a natural and nurturing way to feed an infant, it’s important to be aware of its potential role in baby bottle tooth decay if prolonged and at night without proper oral hygiene. Similar to bottle-feeding, extended breastfeeding sessions, especially those that lull the baby to sleep, can expose teeth to the sugars present in breast milk. While breast milk is considered more beneficial than formula, the prolonged exposure to sugars can still contribute to decay. If breastfeeding, it’s advisable to implement good oral hygiene practices, including wiping the baby’s gums and later brushing their teeth, particularly after nighttime feedings and before sleep. The key principle remains the same: minimize prolonged sugar exposure, especially during sleep.
Pacifier use, while often a comfort for infants, can also contribute to baby bottle tooth decay if not managed correctly. Never dip a pacifier in honey, sugar, or any sweetened substance, as this directly introduces harmful sugars to the child’s teeth. If a pacifier is used, ensure it is cleaned regularly. While not as damaging as sugary liquids, prolonged pacifier use beyond a certain age might also influence dental alignment, though this is a separate concern from decay itself. The primary concern regarding pacifiers and decay relates to sweetened coatings.
When considering weaning from the bottle, a gradual approach is often best. As mentioned, transition to a regular cup around 12 months of age. If bottle use continues beyond this age, it’s essential to ensure that bottles are not used for constant sipping throughout the day or for prolonged periods during sleep. By the time a child is 18 months old, most dental professionals recommend that bottle use for drinking purposes be completely discontinued. This transition is a significant step in fostering healthy oral habits and reducing the risk of baby bottle tooth decay.
The role of saliva in maintaining oral health cannot be overstated. Saliva acts as a natural cleanser, washing away food particles and neutralizing acids produced by bacteria. When a child is constantly sipping on sugary drinks or falls asleep with a bottle, saliva flow is diminished or overwhelmed, reducing its protective capacity. Encouraging water consumption between meals helps to promote saliva flow and cleanse the teeth. Chewing also stimulates saliva production, so introducing a variety of textures in a child’s diet, when appropriate for their developmental stage, can be beneficial.
In summary, preventing baby bottle tooth decay requires a multi-faceted approach encompassing meticulous oral hygiene, judicious dietary choices, adequate fluoride exposure, and regular dental care. Early intervention and consistent vigilance are key. By implementing the strategies outlined in this guide, parents and caregivers can significantly reduce the risk of this preventable dental condition and pave the way for a lifetime of healthy smiles. Remember, the foundation of good oral health is laid in the early years, and the habits established now will have a lasting impact on your child’s well-being.
