
Meal Prep 101 How To Batch Cook 16 Different Whole Grains
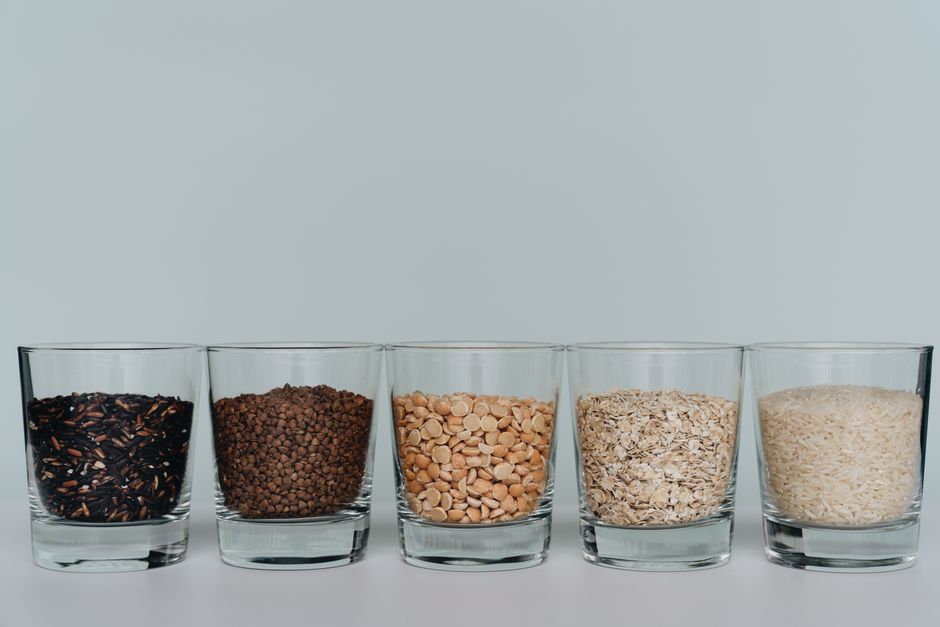
Meal Prep 101: Mastering Whole Grain Batch Cooking for 16 Varieties
Batch cooking whole grains is a cornerstone of efficient meal preparation, offering a versatile foundation for countless healthy dishes. This guide details how to batch cook 16 distinct whole grains, empowering you to create nutrient-dense meals with minimal daily effort. Focusing on proper preparation, cooking techniques, and storage, this resource aims to maximize flavor, texture, and nutritional value, making whole grains an accessible and integral part of your diet.
Understanding the Benefits of Batch Cooking Whole Grains:
Batch cooking whole grains saves significant time during the week. Instead of cooking grains daily, you can prepare a large batch once or twice a week, portioning them for quick assembly into salads, bowls, side dishes, or as a base for stir-fries and other entrees. This practice also promotes healthier eating habits by ensuring nutritious, fiber-rich options are readily available, reducing the temptation for less healthy convenience foods. Furthermore, it can lead to cost savings as buying grains in bulk is often more economical. Batch cooking allows for greater control over ingredients, avoiding added sugars, sodium, and preservatives found in many pre-packaged grain products. The variety achievable through batch cooking 16 different grains ensures a broad spectrum of essential nutrients, including B vitamins, minerals like magnesium and iron, and a wide array of antioxidants and phytonutrients.
Preparing Your Whole Grains for Batch Cooking:
Before cooking, most whole grains benefit from rinsing. This removes any dust, debris, or residual bran that can impart a bitter flavor. For grains like quinoa, rinsing is particularly important as it removes saponins, a natural coating that can taste soapy. Use a fine-mesh sieve and rinse under cold running water until the water runs clear. Some grains, like farro or barley, may benefit from soaking, especially older or harder varieties, to reduce cooking time and improve digestibility. Check individual grain recommendations for soaking times, which typically range from a few hours to overnight. Draining the soaking water is crucial before cooking. For certain grains, toasting them lightly in a dry pan before adding liquid can enhance their nutty flavor and add a desirable textural dimension. This is especially effective for quinoa, farro, and some types of rice.
Fundamental Batch Cooking Techniques for Whole Grains:
The most common and effective method for batch cooking whole grains is absorption, where the grain absorbs all the cooking liquid. The basic ratio is typically one part grain to two parts liquid (water, broth, or a combination). Bring the liquid to a boil, add the rinsed and drained grains, reduce heat to low, cover tightly, and simmer until the liquid is absorbed and the grains are tender. Cooking times vary significantly by grain. Another method, particularly useful for grains like oats or some rice varieties, is the simmering method where grains are cooked in a larger amount of liquid and excess liquid is drained off if not fully absorbed. For larger grains like farro, barley, or freekeh, a slightly higher liquid ratio might be necessary to ensure tenderness. Using broth instead of water adds significant flavor and nutritional depth to your batch-cooked grains.
Cooling and Storing Batch-Cooked Whole Grains:
Proper cooling is paramount for food safety and to prevent spoilage. Once cooked, spread the grains in a thin layer on a baking sheet or shallow container to cool rapidly at room temperature. Avoid leaving large, hot batches of grains to cool slowly at room temperature. Once cooled to room temperature, portion the grains into airtight containers or resealable bags. Refrigerate immediately. Properly stored, most batch-cooked whole grains will last for 3-5 days in the refrigerator. For longer storage, allow grains to cool completely and then freeze them in portioned containers or bags. Frozen grains can maintain quality for up to 3 months. Thawing can be done overnight in the refrigerator or directly from frozen by adding them to hot dishes.
-
Quinoa:
Quinoa is a complete protein, gluten-free, and cooks quickly. Rinse 1 cup of quinoa thoroughly. Combine with 2 cups of water or vegetable broth in a saucepan. Bring to a boil, then reduce heat to low, cover, and simmer for 15 minutes, or until all liquid is absorbed and the quinoa is fluffy. Let stand, covered, for 5 minutes before fluffing with a fork. -
Brown Rice:
A staple for energy and fiber. Rinse 1 cup of brown rice. Combine with 2 cups of water or broth. Bring to a boil, reduce heat to low, cover, and simmer for 40-45 minutes, or until tender and liquid is absorbed. Let stand, covered, for 10 minutes before fluffing. -
Farro:
Chewy and nutty, farro is an ancient wheat grain. Pearled farro requires no soaking. Rinse 1 cup of pearled farro. Combine with 3 cups of water or broth. Bring to a boil, reduce heat to low, cover, and simmer for 25-30 minutes, or until tender. Let stand, covered, for 5 minutes. -
Barley (Pearl):
Hearty and satisfying, pearl barley is processed to remove the outer hull. Rinse 1 cup of pearl barley. Combine with 3 cups of water or broth. Bring to a boil, reduce heat to low, cover, and simmer for 30-40 minutes, or until tender. Let stand, covered, for 5 minutes. -
Buckwheat Groats (Kasha):
Despite its name, buckwheat is not related to wheat and is gluten-free. Lightly toast 1 cup of buckwheat groats in a dry skillet for a few minutes until fragrant. Rinse the toasted groats. Combine with 2 cups of water or broth. Bring to a boil, reduce heat to low, cover, and simmer for 15-20 minutes, or until tender and liquid is absorbed. -
Millet:
Small and golden, millet has a slightly sweet, corn-like flavor. Rinse 1 cup of millet. Combine with 2 cups of water or broth. Bring to a boil, reduce heat to low, cover, and simmer for 20-25 minutes, or until tender and liquid is absorbed. Let stand, covered, for 5 minutes. -
Bulgur Wheat:
Pre-cooked and dried wheat kernels, bulgur cooks very quickly. Use fine, medium, or coarse bulgur depending on your preference. For medium bulgur, use a 1:1 ratio with boiling water or broth. Pour boiling liquid over 1 cup of bulgur in a bowl, cover, and let stand for 15-20 minutes until tender. Drain any excess liquid. -
Amaranth:
Tiny, nutrient-dense seeds, amaranth has a slightly peppery flavor. Rinse 1 cup of amaranth. Combine with 2.5 cups of water or broth. Bring to a boil, reduce heat to low, cover, and simmer for 20-25 minutes, or until tender and liquid is absorbed. It will form a porridge-like consistency. -
Freekeh:
Roasted young green wheat, freekeh has a smoky flavor and chewy texture. Rinse 1 cup of freekeh. Combine with 2.5 cups of water or broth. Bring to a boil, reduce heat to low, cover, and simmer for 20-25 minutes, or until tender. Let stand, covered, for 5 minutes. -
Wild Rice:
Technically a grass, not rice, wild rice has a distinct nutty flavor and chewy texture. Rinse 1 cup of wild rice. Combine with 3 cups of water or broth. Bring to a boil, reduce heat to low, cover, and simmer for 40-50 minutes, or until tender and the kernels have split. -
Sorghum:
A hardy grain with a slightly sweet, malty flavor. Rinse 1 cup of sorghum. Combine with 3 cups of water or broth. Bring to a boil, reduce heat to low, cover, and simmer for 45-60 minutes, or until tender. Let stand, covered, for 5 minutes. -
Teff:
The smallest grain in the world, teff is rich in iron and calcium and has a mild, earthy flavor. Rinse 1 cup of teff. Combine with 2.5 cups of water or broth. Bring to a boil, reduce heat to low, cover, and simmer for 15-20 minutes, or until tender and liquid is absorbed. -
Oats (Steel-Cut):
Steel-cut oats are less processed than rolled oats and offer a chewier texture. For batch cooking, a ratio of 1 cup steel-cut oats to 4 cups water or milk is recommended. Bring liquid to a boil, add oats, reduce heat, and simmer for 20-30 minutes, stirring occasionally. They will thicken considerably as they cool. -
Kamut (Khorasan Wheat):
An ancient grain with a nutty, buttery flavor. Rinse 1 cup of kamut berries. Combine with 3 cups of water or broth. Bring to a boil, reduce heat to low, cover, and simmer for 45-60 minutes, or until tender. Let stand, covered, for 5 minutes. -
Spelt:
An ancient wheat relative, spelt has a slightly sweet, nutty flavor and is easier to digest for some than modern wheat. Rinse 1 cup of spelt berries. Combine with 3 cups of water or broth. Bring to a boil, reduce heat to low, cover, and simmer for 30-40 minutes, or until tender. Let stand, covered, for 5 minutes. -
Black Rice (Forbidden Rice):
Known for its antioxidant content and striking color, black rice has a slightly sweet, nutty flavor. Rinse 1 cup of black rice. Combine with 1.75 cups of water or broth. Bring to a boil, reduce heat to low, cover, and simmer for 30-35 minutes, or until tender and liquid is absorbed. Let stand, covered, for 10 minutes.
Maximizing Flavor and Texture in Batch-Cooked Grains:
Beyond water or broth, consider infusing your cooking liquid with aromatics like bay leaves, garlic cloves, or herb sprigs (rosemary, thyme). A pinch of salt in the cooking liquid enhances the natural flavors of all grains. For some grains like quinoa or bulgur, adding a splash of lemon juice or a drizzle of olive oil after cooking can brighten their taste. Experiment with different liquid bases; coconut milk can add richness to certain grains, while vegetable or chicken broth provides a savory foundation. Don’t be afraid to undercook slightly, as grains will continue to soften in their residual heat. For a crisper texture in some dishes, you can pan-fry or toast cooled batch-cooked grains.
Incorporating Batch-Cooked Grains into Meals:
The applications for batch-cooked whole grains are vast. Use them as a base for vibrant grain bowls with roasted vegetables, lean proteins, and a flavorful dressing. Mix cooled grains into fresh salads for added substance and texture. They serve as an excellent side dish for stir-fries, curries, or grilled meats. Blend them into soups or stews to thicken and boost their nutritional profile. Create vegetarian patties or meatballs by mashing grains with binders like eggs or flax eggs, vegetables, and spices. Even breakfast can be enhanced with savory oatmeal or by adding cooled grains to pancake batter for extra fiber. Pre-portioning cooked grains into individual containers makes grab-and-go lunches effortless.
Troubleshooting Common Batch Cooking Issues:
If grains are too mushy, you may have used too much liquid or overcooked them. For future batches, reduce the liquid ratio slightly or shorten the cooking time. If grains are too hard or undercooked, ensure the heat was low enough for simmering and that the lid was tightly sealed. You might need to add a little more liquid and continue cooking. For grains that stick to the bottom, ensure your pot has a thick base or use a non-stick surface with adequate liquid. Rinsing grains thoroughly, especially quinoa, helps prevent bitterness. If grains seem bland, remember to salt the cooking liquid and consider adding herbs or spices during or after cooking. For grains that become dry during storage, a splash of water or broth when reheating can revive them.
